If you need a new computer, but don’t have the money to go all out and buy a totally new laptop, it might be worth considering an update that can give that notebook a new lease on life.
That update is to replace the hard drive with a solid state drive, a fix that ditches the conventional moving parts drive and replaces it with one that brings the computer closer in line with what’s inside an Ultrabook. It’s a job that will void the warranty, but if you’re doing it on a computer over a year or two old, your warranty likely doesn’t exist anymore, anyway.
Computers like the Apple MacBook Air, Samsung Series 9, and Sony VAIO Pro rely on solid state memory for their hard drives, but due to the shape and design, probably don’t have the room for a drive, let alone can be opened up and modified in this way.
But a laptop from the past five years built with a conventional hard drive should be fine, and we’ve found one in the office that we’ll be demonstrating this on: Acer’s 8920G, a five year old 18.4 inch behemoth that ran Windows Vista and took somewhere between one and two minutes to switch on.
Five years is a long time, mind you, and the processor is so old, it predates Intel’s use of the “Core i” naming convention that the company has had for years. As such, there’s only so much of an upgrade we can make to the system.
Thankfully, the hard drive connection standard hasn’t changed dramatically, and this computer supports the SATA connections, which is what has been in computers for a while. With a solid state drive replacement, we can boost that start-up time to something more useful, and upgrade the operating system in the process.
Before you start, you’ll need to have your installation media ready to go, whether that’s an old copy of Windows XP, Vista, 7, or even Windows 8 coming from a bootable USB stick.
For some people, the easiest way of making this happen will be installing from an optical disc, such as the one you get when you buy Windows outright. If you don’t have one off-hand, you can download a disc image and burn a CD.
If your laptop lacks an optical drive (like if you’re upgrading a netbook or sub-notebook), use your current computer to download a disc image and make an installable Windows USB stick. If you’re unsure how to do this, remember Google is your friend.
Once you have this part ready, back up any files you want to move to the new computer to a disc or USB stick. We’re not writing over an old hard drive with this tutorial, but if you want to take files from your current drive, you’ll need to either plug it in through an external drive mounting accessory, or put that old hard drive back in the computer.
With that done, grab your solid state drive, and tool set, because it’s time to crack open our computer and get to work.
Remember that opening up a computer should be done by or with someone who is confident in identifying parts of the computer.
You don’t want to be confused when you open it up and pull the wrong part out, ruining the computer. Every computer is different, but we’ll show you what part you’re looking for to make it easier. Even with this, we still recommend doing this with someone who has seen the inside of a computer before.
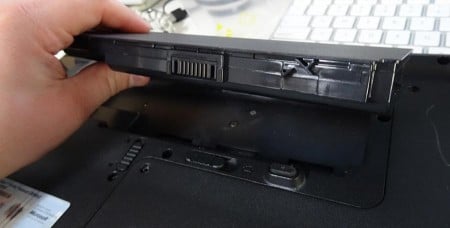
Flip your laptop on its back and take the battery out. This is important, as you don’t want the computer accidentally switching on while you’re opening it up.
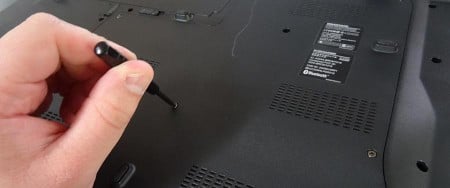
Once that’s out of the way, unscrew the bottom and pop the casing off.
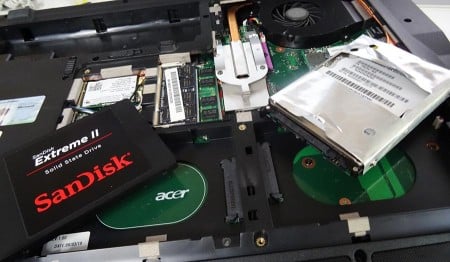
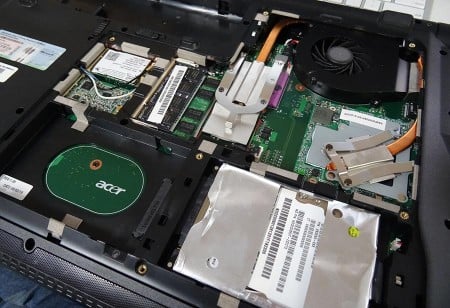
As we said before, every computer is different, but what you’re looking for is the part of the computer that resembles a small hard drive. In our Acer, this was covered in silver plastic and sat in one of two hard hard drive bays.
To take it out, you generally have to slide the drive out, detaching it from its ports and allowing you to remove it easily, as we did in ours.
Once that’s done, you can put the solid-state drive in its place, pushing it back in so that the new drive sits snugly in the bay, connected to the computer by way of those ports.
That’s most of the modification done, and you can now put the cover back on, though we’ll wait to screw it back in until the operating system is installed, otherwise we’ll be forced to remove those screws again.
Stick the battery back in, plug in the power cable, and switch your computer on. You’ll probably find that there’s no Windows for you to load, no operating system, and the computer just sits there waiting to find something.
What next?


