

The Ninja Foodi Grill is a multi-cooker that uses cyclonic grill technology (fan-forced heat) that can do almost everything an oven, grill, and BBQ can. But it takes a little mastering. I am now a master!
The Ninja Foodie Grill AG301 should not be confused with the Ninja OP300 Foodi that is more a pressure cooker, air fryer and slow cooker. I suspect this iteration has a broader use in the kitchen.
When you use a Ninja Foodi Grill, you need to rethink about how you cook.
While it is intuitive and easy to use, you must view it as a ‘serial’ cooker that can do many things – one or a few at a time.
First, you need to think and plan for it to do the heavy lifting, e.g. grill or roast meat and veggies (we will come to capacity later) while you use other appliances like the microwave for peas and the stove top to boil potatoes for mash, etc.
Second, you need to rethink cooking times. Where you might roast a boneless lamb leg in a Weber for two hours and put the veggies in halfway through, the Ninja Foodi Grill is very fast. It is only through a little experimentation that you will find the right times.
For example, we tried char grilling a bunch of Asparagus (recommended MAX setting for 5-7 minutes), but that is too long for our liking. Attempt two saw that cut to 3 minutes! Similarly, for fresh corn-on-the-cob, it recommends MAX, 12 minutes, but it came out a little too char-grilled. Our second attempt at 8-minutes was perfect. As you use it, write down the times so you can adjust them next time if needed.
Third, persevere and don’t be afraid. I remember the same timing issues with my first microwave, adjusting grilling times with a Breville Double Grill (that cooks both sides at once) and the Weber was a real experiment that I never really mastered. It will all become muscle memory.
Ninja Foodi Grill AG301
Website: here
Price: $399.99 with free Australia Post delivery for online orders
Warranty: 1 year
What is in the box? (Sizes are approximate)
- Ninja Foodi Grill AG301 45 (D) x 30 (W) x 30 (H) cm x 7.5kg (without inserts)
- Clip-in splatter/smoke shield (always in use)
- 5.6L ceramic coated Cooking pot (always in use) 28 (square) x 10 (D) cm
- 3.7L ceramic coated air fryer/crisper insert 25 x 21 x 7cm (note this is not a deep fryer for use with oil)
- Grill insert 25cm square
- Nylon cleaning brush for grill
- Instructions and cookbook

The top door/lid swings upwards to 45cm (fits well under 600mm overhead cupboards) and the minimum bench depth is 60cm.
While it gets up to 260° inside, the outside has cool touch lifting handles. Hot air comes out of a grill at the top back of the lid. I doubt that the air stream would damage a splash back, but you need to avoid placing it near a painted wall or under benches etc.
Power use: It is rated 1760W, confirmed by our EmberIQ metre. That means for every hour of cooking it will cost about 80 cents at peak rates (50c per kWh).
Maintenance
I am going to skip to maintenance before we look at food because some appliances are truly awful to clean after use – this is not.
You always use the splatter shield and cook pot (to catch oil and food drips).
The air fryer basket is used as necessary as would a round cake baking pan (not supplied but must fit inside the cooking pot). All these are dishwasher safe, and the nylon brush is useful for removing baked-on food like cheese etc. Like all good cookware, look after them and use silicon tipped (not metal) serving tongs, spoons or cleaning tools to avoid scratching the ceramic coatings.
A note on the splatter shield – it is just like a range hood insert except that it is way easier to clean either in the sink or dishwasher. We have found that using a spray oven cleaner every so often strips all semblance of smoke fat away.
Temperature/Time (equivalent to fan-forced oven temperature)
- Grill button: 200 (Low), 230 (Med), 260 (High) and 265° (Max) – 1-30 minutes
- Air Fry: 200° – 1-60 minutes
- Roast: Default to 170° but adjustable – 15-minute increments to 4 hours
- Bake: default to 150° but adjustable – 15-minute increments to 4 hours
- Dehydrate: defaults to 60° but adjustable = 15-minute increments to 12 hours
The Ninja Foodi Grill needs to pre-heat for about 3-5 minutes at which point it tells you to add food. After a cycle, it switches off and is ready for further cooking.
Food, glorious food (updated after twelve months of use)
My wife and I have used in now to cook the main ingredients and reduce the use of other kitchen appliances. What you must remember is that it is fan-forced so food needs to have air movement around it to evenly cook. And second, our review is for two ‘portions’ – you need to assess if it will suit your family-sized needs.
We have managed to substantially reduce the need for other appliances getting bolder each time. We have had no disasters – not to say 100% success but all food was delicious – it is the cooking time and techniques that count.
Grill:
The grill plate is about 25cm square. We cooked 2 x 240g porterhouse, one large corn cob and a bunch of asparagus. Note: Ninja recommends the use of canola, coconut, avocado, vegetable or grape seed oil rather than olive oil to reduce smoke potential.
After selecting GRILL and HIGH, the corn went in first (initially recommended for 12 minutes) and the porterhouse steaks. After four minutes we turned both and at eight minutes removed the steak for resting. We added the asparagus for three minutes. Plate and serve – magnificent.

We attempted to also roast/bake to medium potatoes in the jacket – they browned beautifully and cooked through. The only items we could not cook was caramelised onion (needs a pan fry), and frozen peas (needs microwave). Remember the grill setting is up to 265° so it is very fast. The roast setting is 170°.
We also grilled chicken breast (low-fat meat) for 10 minutes (flip at 5 min). I think that was a little long and I would marinate first and baste directly on the grill plate (messy but tasty) next time.
Summary: Chargrill any meat/seafood/vegetable with confidence – use a meat thermometer to get it just right.
Roast: 170 degrees
We love a good boneless lamb leg roast. We buy that at Woollies and cut it in half for about two 600g pieces. In the Weber, it roasts slowly for about two hours (half of that time is for roast pumpkin, carrots, and potatoes).
Using the cooking pot, we set it to Roast 170° and 60 minutes (the meat thermometer shows internal meat temperature is 65°). The pot has room for a couple of decent-sized chunks of pumpkin, carrot and two potatoes (skin on). I really would have preferred a roast rack insert for the cooking pot, and I note you can buy this and other accessories in the US – not here yet.
At 30 minutes, the vegetables were well done – nicely char grilled and cooked correctly. We removed the veggies as we could reheat them in the Ninja while the lamb was resting. The roast tasted excellent with lovely charred ends (crispy bits).
Take 2 – Lamb perfect

Note we got the times right! All veges have a light canola spray. 
Beatutiful, moist medium lamb with a hint of blood


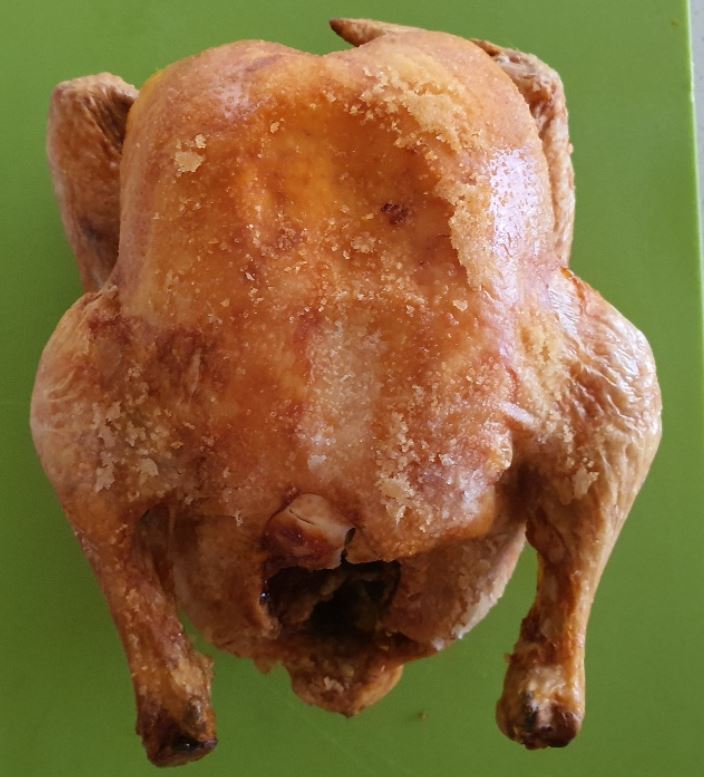
And the 2kg fresh chook cooked perfectly
Recommended oven roast time is 25 minutes per 500g – that is 1.5 hours (100 minutes) for this 2kg chook. Knowing Ninja was faster than an oven we inserted the meat thermometer and it was brilliantly done in an hour. Note that the maximum chook size is about 2kg otherwise it will be too high and hit the splatter screen. Just a note – despite chickens being fatty and splattering making ovens a cleaning disaster – this was very easy to clean.


The glaze was canola oil and salt (perhaps too much salt)

Same deal as the lamb – take the chook out to rest for 10 minutes and put in the carrots and potatoes.
Summary: The cookbook has few roast recipes so experiment!
Air-Fry: Note this is not deep fry or oil fry
We were lazy and used 300g (half a pack) of Birds Eye Deli Seasoned Sea Salt Rosemary chips. Typical cooking time in a 220° fan-forced oven is 20 minutes (turn halfway). Using the Air fryer basket, we selected AIR FRY and the default of 200°. In ten minutes they were ready – delicious.

Summary: Air Fry means that you don’t deep fry in oil so you may need to lightly coat items with Canola spray or oil. It gives a more browned colour. We have more heathy air fry options to explore.
Bake:
We did not have a suitable baking pan, but a traditional round 22.5cm Springform cake pan fits nicely inside the cooking pot. Sorry, we did not experiment with a cake, but there is no reason, given our other test, that it should not make a sponge at similar temperatures and faster times.
Bread is magnificent – Focaccia, Damper, even white or grain bread but you need smaller rectangle or larger round pan.
We tried pizza, but it is too large to fit. Frozen pizza subs or garlic bread fit nicely as long as the pan has air circulation.
Dehydrate:
Not tested
What has GadgetGuy learned about Ninja Foodie Grill?
First, as you may have gathered, I do most of the cooking in our family (yes, my wife can cook). So, I was not as daunted as she when I unpacked it and said we have to review it for a week.
My staple appliances are the oven/griller, gas cooktop, a Breville Double Griller, convection microwave and the trusty Weber.
Would I have gone out and bought a Ninja Foodi Grill? No, I did not know what it was nor that I needed one. And that I suspect will be its greatest hurdle – getting people to understand who it is for, what it is for and what it can replace.

So you must ask, do you need it, what can it do that the usual cooking appliances can’t do and is it indispensable?
First, I think it is best for one or two people. So, as the kids move away, you need a more compact all-in-one alternative. And it makes cooking for one easier again, especially the grill function.
Second, it is great for frozen food – chuck in a frozen Chicken Parma, chips, some veggies and dinner is in 10-15 minutes.
Third, it bakes a frozen or thawed meat pie, quiche, or makes great grilled cheese on toast.
Fourth, if countertop space is limited, e.g. in an apartment, then this and a microwave are all you need.
In my tests, the Ninja Foodi Grill can do the heavy lifting and become more your primary appliance – after the muscle memory kicks in. Have no fear – it works! We can’t live without it.
Note: GadgetGuy reviews any lifestyle technology appliance – check out our Roccbox Pizza Oven review here and coffee machines here


Love the you weren’t trying to sell it but to practically and simply explain how this grill can be used economically. I hope you see this and can respond. I have a question about the different modes. Do you notice if the air circulation speed varies between the modes?
I want to think some of the modes overlap, because they all have different temperature windows. 1). I like to dehydrate tomatoes and I would prefer to speed up the process. So I am trying to up the temp. By using roast (or air crisp) to remove as much of the water as possible then lower the temp. To dry without burning. So far air crisp seems a bit too much so now I am trying roast. Hence my question about the air circulation.
2) I used air crisp for butternut squash and their (Ninja) directions along with advocacy oil. They seemed to not be cooked throughout until almost done and once they were done they were burnt and too dried out. So do I use roast because air circulation is lower (or is it).
I have done a few searches and you seem to have a deeper understanding of how to use.
So here I am wanting to bounce some ideas off you. Thx in advance.
Hi Maggie. I don’t have an air circulation meter so this is a guess. It comes with a main pan (always used) and into that fits a grill tray (used for char grilling meat) and an air fry basket. These pans in their own right change the air circulation but I think its fixed.
I have never tried dehydrating but there is a special dehydrating rack and it takes several hours. See video here https://youtu.be/cNazkFMBwMo
Next roast veggies. You need a high smoke point oil and Avocado is not bad (but expensive). I cook for two (wife and I). Using the Roast setting and I place washed, skin on potatoes (with a wipe of Canola) in first for about 15 -minutes. Then a 500-600g boneless roast (timed for an hour but with a remote meat thermometer to tell me when its 65° internally). About 30 minutes before its ready I take the potatoes out (used a skewer to check) and put in the butternut pumpkin 20mm thick slices, and halved carrots (I simply spray these with Canola). When the meat reaches 65° I take it out to rest 15 minutes and put back in the potatoes et al to finish the roast in the pan fat – yumm. I dont use butternut any more as it tends to dry on the outside and burn. Kent (green skin) is far better.
I use the Nija at least three times a week for roast, grilling steaks, air frying, char-grilled veggies, chicken schnitzel (with ham, pineapple and cheese), frozen pies and chips etc. We now use it for any small baking (freshen bread rolls, buttered naan) and more. Without it my diet would be boring.
But I am not a chef – just a person willing to try.