
When the price of Sony’s Z1P dropped below $8000 from an initial RRP of more than $9000 I was sorely tempted to make the move. When the price hit $6500 – almost $1000 less than I’d paid for my PD150 back in 2001 – I knew it was meant to be. By David Smith.
As often happens when you?re running your own company, lean times are followed by frantically busy ones. I?ve never managed to strike an even balance between feast and famine. So it was over December and January with projects popping up all over the place. A great way to field test (and pay for) the Z1P!
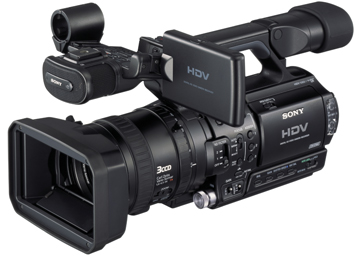
Why the HVR-Z1P?
First up, why did I choose this camera over its smaller sibling the HVRA1P, or even the JVC GY-HD101E? Canon?s XL H1 was not available and, although undoubtedly a great camera, would have been twice the price. In a nutshell, the Z1P had everything I needed at the right price. The Sony A1P has only one custom preset button (six on the Z1P) and many functions are accessed via the touch-screen menu system (clearly labelled buttons on the Z1P). Finally the A1P has that dreaded bottom loading tape bay and it?s actually too small physically to suit my preference although it would make a superb camera in certain restricted and cramped environments.
The JVC is set up like a small Betacam, with its Fujinon removable lens and all the switches in familiar places. However I?ve come to love the ergonomics of the PD150 rather than the ?always on the shoulder? feel of the JVC and given the extra cost and shorter battery life, the Z1P emerged as my perfect choice. I was also not keen on JVCs use of the 720P HDV spec compared to the higher resolution 1080i used in the Sony. Finally, I was impressed with the range of shooting options with the Z1P, including native PAL and NTSC recording and playback, true widescreen shooting and playback in HDV, DVCAM and DV and the ability to down-convert in camera from HDV to DVCAM/DV. This kind of design planning is very impressive and the clincher is backward compatibility.
In use I found the Z1P very familiar after the PD150. Most of the switches and controls are right where I expect them to be and, for a bloke in his 50s, I found the white lettering on the black body very easy to read. This is really important when you need to make rapid adjustments to get the shot and other cameras with dark grey lettering on a grey body could well be improved in this respect.
I like the use of numerous physical switches and buttons on the Z1P, especially those for colour bars, gain and white balance. I also love the six assignable buttons, which I rapidly set up as follows:
- Optical Steady Shot ON/OFF
- Backlight
- Spotlight
- Allscan mode (allows you to see the entire picture to check for vignetting)
- Display (toggles between complex information and none on-screen)
- Marker (lets you choose markers for centre, safe and 4:3, in any combination)
I?m currently using the 4:3 indicators because, for my current projects, I?m shooting in 1080i HDV widescreen but down-converting to SD for editing. One of the projects really needed two-camera cover so I decided to use this to test how well the Z1P down-converted files would match those from the PD150. To do this I set up both cameras in as similar way as possible, using the plain vanilla settings on the Z1P as opposed to any of its various picture profiles. With zero gain, the same shutter speed and carefully matched white balance, the two cameras produced strikingly similar images. The Z1P image was slightly richer and certainly sharper but for this project they were a very usable match. Very handy, because I?d far rather keep using the PD150 as a second camera than leave it sitting around gathering dust!
Batteries
The standard InfoLithium batteries used by all PD150s and 170s are interchangable with those in the Z1P. The Sony batteries such as the NP-F960/70 are superb and will power the camera for up to about 5 hours. However they are expensive and I?m currently testing the Mi VBF-950 which, at $90 is about one-third the price of the Sony’s and so far seems to perform just as well. There are several other after-market brands available so it would pay to shop around.
Battery charge can be seen in the LCD viewfinder even when the camera is turned off which is very handy. There?s a button on the main panel, which displays a colour bar graph as well as an estimate of available time using either LCD screen or viewfinder. Using both LCD and viewfinder together is possible but will take a small toll on battery life.
Audio
Setting audio levels on the PD150 was pretty easy, using the little silver button on the back to access the level meters. On the Z1P it?s even easier, with two well-placed volume dials and clear level meters always visible on the screen. For more accurate setup I just press the STATUS CHECK button and the large Peak meters appear, together with a summary of my mic and monitoring settings.
The only issue to be aware of is that HDV records audio as a highly compressed MPEG 1 Layer II stream. As Douglas Spotted Eagle has pointed out, this is perfectly adequate for most normal recording, including voices and dialogue, but it may not be adequate for highest quality music recording where wide dynamic range and very high frequency response are demanded. In such circumstances audio recording should be made with a DAT or MiniDisk-High Definition (MDHD) recorder. This has definitely not been an issue in my projects to date.
I needed a way to switch quickly and easily from the internal stereo mics to the XLR connectors and this is where the personal P-MENU switch comes in. One of the first things I did when I bought the camera was to set up the personal menu to suit my current needs. You can choose any of 28 features to add to the personal menu, then you can sort them so your favorites appear at the top of the list. I put MIC SELECT first so it?s just a couple of button presses to switch from internal to XLRs. I think I would still prefer physical switches to do this and I?ve always found the audio selector panel on the PD150 very easy to use. Curiously, the same audio unit is used on the A1P and a similar unit could easily have been incorporated on the Z1P but, hey, it?s only two button presses anyway, thanks to the P-MENU.
There?s a holder on the right-hand side of the main handle for a 21 mm diameter shotgun mic such as my Sony ECM 672. The camera features sound-reversal noise reduction so camera motor noise won?t be a problem. I normally use an external shotgun mic operated by a sound recordist ? usually Denby ? so the on-board holder can be used for a second camera mic if required. Phantom power is switched on for each channel by switches near the XLR connectors.
I always worry about dust or sand getting into those exposed XLRs and I?ve discovered that Panasonic make excellent little dust caps for just that purpose. You can also use the plastic dust caps from portagas bottles if you get stuck ? they fit perfectly but they only come in red, brown and yellow.
Ergonomics
I?ve often remarked that I find many modern domestic video cameras too small to use properly and so I love the physical size and weight of the Z1P. In some ways it reminds me of my old Arriflex 16BL film camera ? you can wrap your left hand comfortably around the zoom or focus rings while taking the weight with your right. Of course it?s nowhere near as heavy as an Arri but is has the right ?heft? to it which makes hand-held work really smooth and easy to control.
Focussing
With such a razor-sharp lens, focussing is critical, again reminiscent of shooting film. It?s also critical to have a spotlessly clean lens and I mean no spots at all. They?ll be brutally clear onscreen if you don?t pay attention to lens hygiene. Fortunately with videotape you can?t get ?hairs in the gate?, but dust spots and soft focus are very evident especially if you display your work in full HDV.
One advantage of the larger CCDs is that you can get better separation of your subject from the background than you can with a standard DV camera, especially if you can arrange the lighting so the lens is nearly wide open.
Sony has provided a button just behind the main zoom rocker to quadruple the image size for critical focussing. This is fine if you?re using the camera at eye level with your right hand in the normal position under the grip belt, but I often shoot with my right hand under the camera and my left wrapped around the focus ring. I?d love to have another expanded focus button right above the 3CCD badge on the lens barrel where it would fall naturally under my thumb, but that?s a minor glitch and probably the only control that?s either missing or badly placed.
Finally, to assist focussing, there?s a PEAKING switch on the top back panel that lets you highlight the focus point in a selectable colour.
Zooming
There are good options for zooming on the Z1P. The main zoom rocker is excellent with its large size and pressure-sensitive variable speeds. The tiny rocker on the upper carry handle can be very useful, especially when shooting low-angle stuff. It?s not pressure-sensitive but has two preset speeds, which are selected by a small switch on the left of the handle. Each setting can be adjusted from 1 to 8 via the menu system. Zooming can also be controlled via the remote control unit.
Low-angle shooting is also helped by the fact that the LCD screen can be twisted, than folded back so that it?s facing upwards. Very handy!
A switch on the lens barrel selects either ?levers and remote? or the main zoom ring. The zoom ring is calibrated from 4.5 to 54mm and is non-perpetual. It?s very good to use and similar to a truly manual zoom ring but in my view no servo system gives an operator the precision that can be achieved by a human hand. However it is great to have this zoom ring and it?s also great that it?s calibrated. Now if only the focus ring were the same…
I find the autofocus to be extremely good with virtually no hunting. So I?ve set the internal option for FOCUS ASSIST, which means that in autofocus mode I can let the autofocus do most of the work but then I can still tweak focus with the focus ring. This feature is brilliant!
The lens hood features a pair of lever-operated snapping doors. You don?t have a lens cap to lose, but I actually prefer something that?s a bit better at keeping dust off the lens ? especially this superb piece of Zeiss optics! The first accessories I bought were a UV filter and a 72mm lens cap. There?s room for two or three filters within the Sony lens hood, but I?ve dug out an old Tiffen Pro Series 9 lens hood, which allows me to use a circular polarising filter and also to use the ?real? lens cap for better protection. Dust is your enemy!
One accessory you will probably need is a wide angle adaptor and you?d better brace yourself for the price. Any adaptors need to have an optical quality that won?t degrade the work of the superb Zeiss T* series HD lens. Expect to pay about $900 for the Sony adaptor or almost two grand for the unbeatable one from Century. Similarly, diopters for close-up work will set you back about $500 each, and they normally come in sets of three. So without blinking you could spend half the price of the camera on optical add-ons but the picture quality is on a par with digi-Beta and they cost vastly more than ten grand!
Capturing your video
A great advantage of Sony?s forethought in allowing down-conversion to SD is that you can ease into the HDV world using your current computer and editing software. Editing native HDV is also possible using proxy files ? more about that in a later article.
Capturing video to your computer is very simple, provided you set the camera up correctly. The procedure described here is for the most common current use of the camera, which is to shoot in HDV and down-convert to SD. There are several decisions to make.
In the main menu there?s a section for setting your input and output preferences. You must get these right or the camera won?t be recognised by your software. The settings are:
- Switch the camera to VCR mode
- Turn i.LINK CONV to ON
- Go to DOWN CONVERT and make your selection. You can SQUEEZE, LETTERBOX or EDGE CROP your picture as it?s converted. In my 4:3 two-camera project, I want to EDGE CROP which is why I used the 4:3 markers in the viewfinder to frame within that format.
There?s one other thing to set up and it?s not immediately obvious. It?s covered in the Cineform Knowledge Base (Cineform Knowledge Articles / HD Camera/Deck Info / Required settings for capture of HDV content)
In the menu there are two settings that must be set correctly:
- The VCR HDV/DV setting must be set to HDV
- The AV- DV Out setting must be set to OFF
If these are set to AUTO your camera won?t be recognised. You?ll see that the blue HDV indicator on the top left of the camera is lit, as is the blue DV indicator beside the i.link jack near the battery. This confirms that you?re playing back your HDV tape and down-converting an SD stream via i.link.
Apart from these issues, capturing is totally reliable and the video image quality is fantastic. This is primarily due to the high quality HD lens and far better CCDs, operating in the 4:2:0 colour space.
There are numerous other features that make this camera a dream to use, not least of which is the SHOT TRANSITION SYSTEM. This allows you to set up two scenes and make a perfect transition between the two. You may need to start on an indoor wide shot under tungsten light, then pan across to a window and zoom out to a close-up of a flower in the garden in full daylight. Almost impossible to do manually but with the Shot Transition you just set up everything you need for Scene A and lock it in, adjust your white balance, focus, zoom, gamma etc for Scene B and lock that in. Dial in the number of seconds required for the transition, set up the countdown timer and Voila! you?re done. If you mess up your pan, just do it again. This is like having a George Lucas computer controlled camera ? because that?s basically what it is. Unbelievable at this price!
Verdict
I have high hopes for this camera and so far I?m absolutely delighted with its performance. It?s highly customisable and has been very cleverly designed. The optics and imaging systems are truly superb and the ergonomics make it a delight to use. It integrates perfectly with my other gear and edit suite and is small enough to be a relatively unobtrusive camera, which I prefer. The only real problem is that I need to buy a weather shield to stop people drooling all over it!
